Anuncios
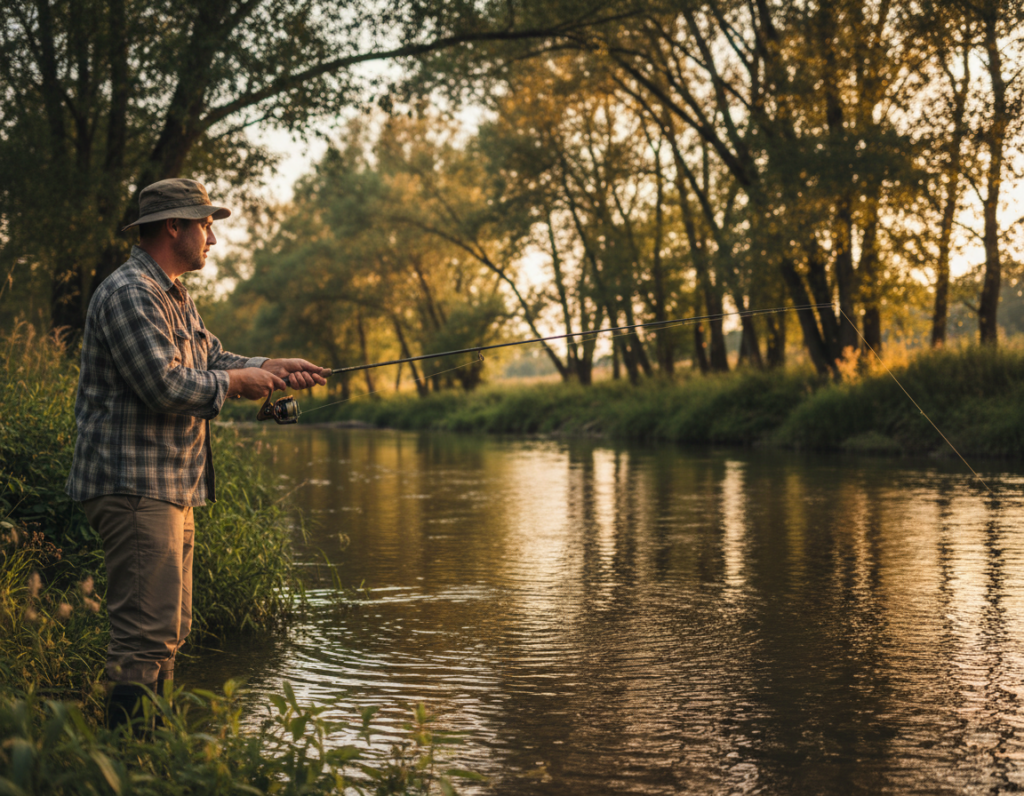
Welcome to a practical beginner’s guide for anglers who want to learn how to present a lifelike imitation to trout, bass, and panfish in U.S. rivers, streams, and lakes.
Fly fishing sends a weighted line to place a nearly weightless artificial fly where real prey drifts. That one change alters how you cast, mend, and read water compared with standard rod-and-reel approaches.
Early progress depends more on control than on luck. You will focus on how line and fly move before you tally big catches. This guide previews four pillars: essential gear, casting fundamentals, fly selection (dry vs subsurface), and reading fish behavior.
Expect clear, actionable checklists and simple practice routines you can use at home or ask about at a local fly shop. By following these steps, beginners can shorten the learning curve and start presenting flies in believable ways with steady confidence.
Why Fly Fishing Feels Hard at First (and How Beginners Get to Confident)
Beginners often find the sport awkward until they learn that rhythm matters more than strength. In conventional angling you fling the weight of a lure. In this style, the line supplies the weight that loads the rod. That difference makes old habits fail on the water.
Anuncios
Technical cues—managing slack, shaping tight loops, and moving the rod tip with the traveling line—make early practice feel complex. These are skills you build in small steps rather than by trying to muscle a long cast.
What successful early progress looks like
Measure success by control, not by fish count:
- A clean cast that straightens without collapsing.
- A drift that rides true without drag.
- Choosing a fly that matches water and insect activity.
Common mistakes—tailing loops, wind knots, and slapping the line—usually come from rushing the pause or using too much wrist. Slow down the rhythm and your loops will form cleaner, your accuracy will improve, and tangles will drop.
Anuncios
Simple tips to build confidence
Start with short targets. Cast to a nearby “fishy” lane and focus on placement. Repeat short, controlled casts until timing feels natural. Over time, steady practice beats brute force.
Want a structured plan? The rest of this guide walks through gear, casting drills, and reading water so anglers can turn awkward first outings into consistent progress. For a deeper primer, see fly fishing basics.
Fly Fishing Basics: The Core Pillars You Need to Know
Think of learning as stacking small wins: gear, cast, presentation, and water reading. Each pillar shortens the path to consistent success on rivers and lakes.
Gear that actually matters for catching fish
What to buy first
Start with a balanced rod, reel, and line matched to freshwater trout. Add a tapered leader, short tippet spools, and a handful of reliable flies that imitate local food. Skip specialty items until you can cast confidently.
Timing beats power in the cast
Casting is a rhythm game. Use smooth acceleration, a crisp stop, and a pause to let the line straighten. Practicing that timing makes long casts feel effortless and improves accuracy.
Surface or subsurface — two main choices
Presentation splits into surface patterns and subsurface rigs. Dry patterns float; nymphs and streamers work below. Remember, trout often feed under the surface most of the day, so subsurface tactics earn more strikes.
Where trout hold and why it matters
Look for seams, riffles, undercut banks, and deeper runs. Those zones deliver steady food with low effort. A perfect cast means little unless your fly drifts through a feeding lane.
- Roadmap: gear → casting → fly choice → read water.
- Stack small wins: the right gear helps you cast; the cast places the fly; placement triggers strikes.
Essential Fly Fishing Gear for Beginners
A practical, balanced setup removes a lot of beginner guesswork on rivers and lakes. Start with choices that help you learn casting and presentation, not gear complexity.
Rod basics: choosing length and weight
Recommendation: a 9-foot, 5-weight rod is the most versatile choice for trout on rivers, streams, and lakes.
Use a 6-weight if you plan to cast bigger flies or target bass. Lower numbers (1–3) mean lighter line and tiny flies for small streams. Higher numbers (7+) suit steelhead and salmon.
Reels and drag: balance and function
Pick a reel that balances your rod and holds backing and line. For most trout work, a simple reel with a reliable drag is enough.
Disc drags are smooth under pressure; click-and-pawl systems are lighter and cheaper. Prioritize durability and easy maintenance.
Line matters: why the line loads the rod
Core concept: the line provides the casting weight that bends the rod, not the tiny flies at the tip.
Choose a quality taper and match the line to your rod weight to make casting easier and more consistent.
Visibility and safety: polarized sunglasses
Polarized lenses cut glare and let you spot fish and structure beneath the surface. Brown or copper tints work well in varied light.
Vented frames reduce fogging on cool mornings and warmed up afternoons. Treat sunglasses as non-optional safety gear.
Small tools that save time on the water
- Nippers for quick tag-end cuts.
- Hemostats or pliers for safe hook removal.
- Rubber “ghost” nets to reduce tangles and protect fish.
Pro tip: visit a local fly shop with your target species and water type. Staff can match a setup to local conditions and speed your learning curve.
Understanding Fly Line, Leader, and Tippet
A clear line system is the backbone that turns practice casts into reliable presentations. Learn the parts and how they work together so your fly drifts naturally and you detect strikes faster.
Floating, intermediate, and sinking lines
Start with a weight-forward floating fly line. It’s the most versatile choice for dry patterns, indicator nymphing, and learning line control.
Intermediate lines sink slowly for near-surface presentations. Sinking lines pull deep for lakes and streamer work. Buy those only when you need deeper reach.
Key parts from reel to fly
- Backing — extra line on the reel for long runs.
- Running line — thin section for distance and line control.
- Taper (the front) — the engine that transfers energy so the fly turns over cleanly.
Leaders, tippet, and connections
A tapered leader turns over the fly line; the tippet is the thin, replaceable end tied to the hook. Use loop-to-loop or a simple nail knot between line and leader, and a reliable knot from tippet to fly.
“A tidy system reduces tangles and raises hookup rates.”
Clean connections and the right line choice improve presentation, help your fly drift true in the water, and increase your chance of a solid hookup.
How to Set Up Your Fly Rod and Reel (Quick, Practical Overview)
A quick, repeatable rig-up helps beginners spend more time casting and less time fixing tangles.
Quick setup checklist:
- Attach the reel securely to the fly rod and tension the seat.
- Confirm the fly line weight matches the rod weight (a 6-weight rod with a 6-weight fly line, for example).
- Connect a tapered leader and the appropriate tippet for the flies you plan to use.
Matching line to rod weight matters because it loads the rod predictably. That makes learning the timing of the cast easier. You feel when the rod stores and releases energy.
Begin with only about 3–6 feet of line outside the tip. This short length cuts slack, prevents early tangles, and helps the turnover sequence work cleanly.
As your rhythm improves, add a few extra feet at a time. Focus on control over distance so your presentations stay accurate and natural for trout and other fish.
Get ready-to-fish checklist
- Straighten the leader and remove memory coils.
- Verify knots and trim tag ends.
- Keep excess line tidy at your feet — you’ll strip by hand more than you reel in most trout scenarios.
Final tip: a clean rig is the foundation for good techniques. When your gear is tidy, your cast timing and drifts become far more consistent and effective.
Fly Casting Techniques Every Beginner Should Practice
A steady cast starts with a simple rhythm anyone can practice in a backyard.
Overhead casting breaks into three repeatable moves: a smooth back cast, a short pause as the line straightens, and a crisp forward cast. Focus on the pause—rushing it makes piles, tailing loops, and lost control.
El roll cast works when trees or brush block a back cast. Form a D-loop with the line behind the rod and use a firm forward stroke to place the fly without a full back cast.
El reach cast is an in-air mend. After the forward cast, push the rod tip upstream to set the line so your presentation drifts without drag and gets fewer refusals.
Mending keeps a natural, dead drift on moving water. Lift and flip the line upstream with a quick wrist motion to slow the drift through seams and mixed currents.
| Technique | When to use | Key benefit |
|---|---|---|
| Overhead cast | Open water | Accuracy and distance |
| Roll cast | Tight quarters | No back cast needed |
| Reach cast | Short to medium casts | Drag-free drift |
| Mend | Rivers and seams | Extended dead drift |
Practice drills: short, targeted casts on grass, aim at cones, and work on tight loops before adding distance. Know where your fly travels on the back cast to avoid accidents.
Resultado: better timing and line control lead to cleaner presentations, and cleaner presentations are the fastest way for anglers to catch fish consistently.
Dry Flies vs Wet Flies: When to Fish the Surface or Subsurface
The decision to fish the surface or work subsurface starts with watching the water for clear feeding cues.
What “dry” really means
Dry flies are floating imitations that ride the film and mimic insects on top. They offer a visual thrill when a trout slurps a pattern. That drama is fun, but surface options are not always the most consistent choice for catching fish.
What “wet” covers
Wet flies include nymphs and streamers that sink and live below the film. Most trout feed under the surface most days, so subsurface presentations often hit the fish where they feed.
Reading the clues
Look for rising or slurping trout and visible insects to choose a dry approach. If the surface is quiet, switch to nymphs or streamers to reach the bottom or mid-depth feeding lanes.
- Current speed: slow seams favor top feeding; faster water pushes food below.
- Water clarity: clear water encourages surface takes; stained water favors subsurface tactics.
- Beginner decision tree: look first, choose surface or subsurface, then match size and presentation.
Recordar: both methods need a believable drift and clean line control to fool trout and trigger strikes.
Best Fly Patterns for Beginners (and What They Imitate)
Pick a small set of proven patterns and you cover most water types without overfilling your box. A compact selection helps you focus on presentation and drift, which catch more trout than flashy gear.
Trusted dry patterns
Parachute Adams, Elk Hair Caddis, and the Stimulator are staple surface choices. They broadly imitate mayflies, caddis, and large attractor insects. Use them when you see rises or insects on the surface; their profiles work across many U.S. rivers.
Why nymphs matter
Trout feed beneath the film most of the day. Carry a few nymphs in different sizes and weights to reach the bottom or mid-column food. Nymphs are the most consistent producers for steady bites.
Streamers as search patterns
A Woolly Bugger and a simple baitfish-style pattern act like leeches or minnows. Use them to trigger aggressive fish and find active lies when other patterns fail.
Size and color guidance
In stained or high-light water, pick brighter, larger patterns. In clear conditions, go subtler and more natural. If you’re not getting takes, change one variable at a time—first depth, then size, then color.
“A few well-chosen flies and a believable drift beat an overloaded box every time.”
Local shops and hatch charts speed learning what trout eat on a given river. Match imitation to local food and keep presentation honest for the best results.
Where Fish Live: Understanding Trout Behavior in Rivers, Streams, and Lakes
Trout pick spots where food drifts to them with the least effort. Read structure and current instead of guessing. That skill is a key advantage for anglers learning fly fishing.
Holding water: seams, riffles, undercut banks, and deep holes
Trout hold where current delivers snacks and provides cover. Look for seams (bubble lines), riffle edges, the soft side of boulders, and undercut banks.
Deep holes and shaded runs also concentrate fish. These spots give protection while keeping access to moving food in the water.
Energy and safety: why trout prefer slower water near food
Fish conserve energy by sitting in slower pockets next to faster water. They dart into the current to feed, then return to rest.
This energy equation explains why structured, broken water outproduces flat, featureless sections for most anglers.
Depth strategy: reaching deep pools and fishing near the bottom
To reach fish in pools, use heavier patterns or add weight so your presentation travels near the bottom. Occasional ticks or light hang-ups often mean you’re in the feeding zone.
Constant snagging signals you’ve gone too deep or need to change angle. Place your line and fly precisely in feeding lanes for the best contact with trout.
Reading the Water and Matching the Hatch
Find the meeting lines between swift and slow water and you find the highest-percentage spots for trout. Those seams and foam streaks act like conveyor belts, sending insects into calmer pockets where fish wait.
Spotting feeding lanes
Look for seams marked by bubbles, foam, or floating debris. These indicate current transitions where food concentrates.
Why they matter: trout hold in softer current and dart into the fast flow to feed. Fishing these lanes gives anglers consistent chances to connect.
Using insect activity to guide choice
Watch for adults on the surface, shucks on rocks, and steady rises. Those cues tell you whether fish take at the film or below it.
Consejo: dry patterns need close size matching; if rises show small mayflies, downsize your imitation before changing presentation.
Simple hatch-matching workflow
- Observe insects and rise behavior.
- Match size first, then color and profile.
- Adjust drift and presentation before switching patterns.
If fish refuse on top: try a subsurface imitation of the same insect stage or present a nymph in the same size range.
| Cue | What to look for | Acción rápida |
|---|---|---|
| Seam / Foam line | Bubbles, debris, faster to slower flow | Cast upstream along the seam; mend for drag-free drift |
| Surface activity | Rises, adult insects, wings or shucks | Match size; present a clean, soft landing |
| Silent surface | No rises; drifting nymphs likely | Fish subsurface patterns and vary depth |
Planning Your Trip: Finding Productive Freshwater Fly Fishing Spots in the US
Good trip planning pairs local intel with real-time data so you spend time casting, not guessing. A short routine will point you to productive water and the right tactics for the day.
Local shop guidance
Start at a nearby fly shop. Staff share what flies are working, current fish behavior, and which techniques—nymphing, dry-dropper, or streamer—are producing.
Ask about regulations and recent hatch notes before you go.
Reports, forums, and apps
Check trustworthy reports and state DNR pages for flows, closures, and stocking updates. Use apps and forums for on-the-ground feedback, but verify entries against official sources.
Clubs and hands-on learning
Join a club or workshop to accelerate skills and gain access to private water. Learning from experienced anglers saves years of trial and error.
Practical planning tips:
- Match river or stream size to your skill level.
- Pack a small, adaptable set of flies, leaders, and tippets.
- Combine shop intel with live reports to pick your destination.
For guidance on finding nearby productive spots, see this short guide: where to fly fish nearby.
What to Pack and How to Check River Conditions Before You Go
A quick gear check and a glance at river gauges set the tone for a productive day on the river. Take a few minutes to confirm basics so you spend more time casting and less fixing problems.

Beginner packing checklist
Pack light, but pack smart. Bring your rod and reel, a spare leader and tippet, and a small selection of flies that match local food.
Include wading boots or sturdy shoes, a waterproof jacket, polarized sunglasses, nippers, hemostats or pliers, and a rubber net.
Carry enough food and water, a small first-aid kit, and a secure place for hooks and tools so they stay accessible by hand.
Check flow rate, gauge, and temperature
Use state gauges or apps to check flow and gauge height before you leave. Water level and temperature affect safety and fish behavior.
Higher flows often push fish to edges and seams. Very cold or warm water can shut down feeding and change the best time to fish.
Weather changes and rising water
If flows spike, visibility drops, or footing feels unstable, move to higher ground or bail early. Rapid rises and storms are a clear safety red flag.
System check: verify knots, hook sharpness, and tippet condition as a final step. A quick inventory saves time and keeps your day safe and effective.
Catch-and-Release Done Right: Proper Fish Handling and Safe Releases
How you treat a fish in the first 30 seconds affects its survival long after you slip it back. Responsible catch-and-release is an essential part of fly fishing basics, especially on pressured trout water across the United States.
Hands wet, gills protected
Wet your hand before touching any fish. A damp hand preserves the protective slime layer and lowers infection risk.
Support the body with one hand under the belly and keep the gill plates clear. Whenever possible, keep the fish in the water while you work.
Landing nets that help, not harm
Use rubber, knotless nets. This gear reduces slime loss, prevents fin damage, and keeps flies from tangling in the mesh.
Smart hook removal and the cut-the-line rule
Prefer barbless hooks or crimp barbs for fast removal. Use hemostats to back out a shallow hook quickly.
If the hook is deep or removal risks injury, cut the leader close to the hook and release. Shorter handling and quick release increase the fish’s chance to recover.
Fight time and revival
Keep fights short; prolonged tiring raises post-release mortality, especially in warm water. After unhooking, hold the fish facing into gentle current and let it regain strength.
Release only when the fish turns and swims away strongly.
Conclusión
Treat each session as a short experiment: pick one river or stream, practice two casts (overhead and roll), aim for a single dead drift with a mend, and note what worked.
Start simple: use a balanced rod and reel with a matched line and keep your leader and tippet tidy. That consistency makes presentations repeatable and helps you spot small improvements fast.
Simplify flies to a handful that cover surface and subsurface. Refine size and depth before swapping patterns. Remember where trout hold: seams, undercuts, and softer water near food.
Ask local shops and anglers for specific tips and current reports. Practice ethical handling—wet hands, quick hook removal, and short fight times—to protect fisheries.
Confidence builds by stacking basics: setup, timing in your casting, and reading water. Keep at it and fly fishing will reward steady practice for years to come.